HTML websites have come a long way from being static text content to dynamic responsive content. With website builders like Mobirise, building websites has become very very easy. You can use Mobirise to build sites using a drag and drop editor which has thousands of blocks and functionalities like contact forms, Google maps, reCAPTCHA, social media integrations, sliders, galleries with parallax and many more functionalities. Mobirise also has Android app to modify and publish content from mobiles and tablets. These website builders take away the pain (for some) of writing code and fixing CSS. It also has a feature to deploy via FTP or push to GitHub pages among other options. With little bit knowledge of YAML scripts, you can use GitLab to deploy content to your shared hosting on each push.
Then what is the need for WordPress you may ask if we get website builders to do so many things nowadays? WordPress is a CMS(Content Management System) that means it has capabilities of creating, managing and publishing content from one place with a very easy to use interface. It requires no knowledge of HTML or CSS whatsoever. It comes with thousands of plugins that help in adding content to a site a very easy task. You don’t need to push content manually or even think of CI with a CMS.
In this article, we will be converting a HTML website to a WordPress site by a manual process. There are many sites and plugins which claim to do that with ease but we will get our hands dirty and do it manually. Why? For fun of course.
Few things we need before we jump into the conversion process
A HTML website or template (I am using a Mobirise website)
A little knowledge in basic HTML, CSS and PHP
A WordPress installation either locally (XAMPP) or on a hosting site
Basic folder structure and files
We will be using a HTML site. I will be using this template built with Mobirise. So, this will be our final product.
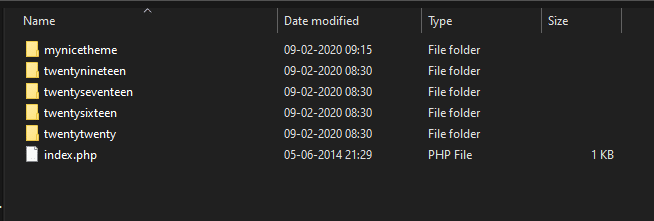
Your basic folder structure in a WordPress installation will contain folders listed on the left inside the wp-content/themes folder. We will create a new folder inside that with the theme name of our choice. I have created on with the name mynicetheme.
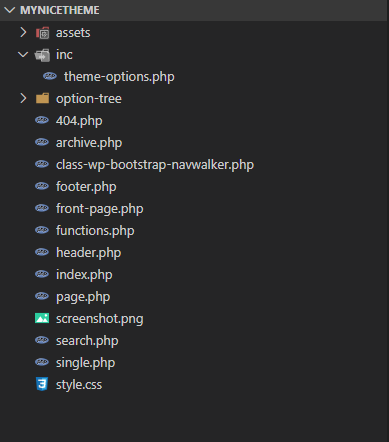
Inside the folder mynicetheme we will add the following files:
index.php
front-page.php
header.php
footer.php
404.php
archive.php
page.php
single.php
functions.php
search.php
style.css
In addition to the above files, you might notice a file class-wp-bootstrap-navwalker.php and folders option-tree and theme-options.php. Let’s ignore the option-tree folder and theme-options.php file for now. We will re-visit that later. The class-wp-bootstrap-navwalker.php file is a custom nav walker which will help us in customising our bootstrap nav bar. I am using a plugin from here. Please remember to download full folder and copy this single file and paste it inside our custom theme folder.
Also, take a screenshot of your page and upload it to the custom theme folder with name screenshot.png.
Let’s start with our file modifications
Open style.css file and add the following lines inside it. Please modify the values as per your wish. More details of what you can add can be found here.
/*
 Theme Name: My Nice Theme
 Author: Deepak Dhamuria
 Author URI: https://www.deepakdhamuria.com
 Description: This is My nice Theme
 Version: 1.0.0
 */
2. Open your index.html in a text editor (I use Notepad++) of your HTML website and copy the content from top till end of header and paste the same inside the header.php file of your theme. Something like the code below (Please do not copy and paste below code). Your header code might be wrapped in a <section> or a <div> or a <header>. Now add a line <?php wp_head();?> just before the end of the </head> tag as shown below. This line defines this file to be a header which gets added to each page.
<!DOCTYPE html>
<html>
<head>
    <meta charset="UTF-8">
    <meta http-equiv="X-UA-Compatible" content="IE=edge">

    <meta name="viewport" content="width=device-width, initial-scale=1, minimum-scale=1">
    <link rel="shortcut icon" href="assets/images/logo-90x90.png" type="image/x-icon">
    <meta name="description" content="">

    <title>Clothes</title>
    <!-- All your style links -->
    <link rel="stylesheet" href="assets/styles.css">

     <?php wp_head();?>

</head>
<body>
    <header>
        <!-- All your header code including navs, header images, logo etc. -->
    </header>
3. Copy the code from footer section till end of file from same index.html and paste inside the footer.php file inside your template. Something like below code (Please do not copy and paste below code). Now add a line <?php wp_footer();?> just before the end of </body> tag as shown below. This line defines the file to be a footer which gets added to each page.
<footer>
     <!-- Your footer code -->
    </footer>

    <!-- Your scripts -->
    <script src="assets/web/assets/jquery/jquery.min.js"></script>

    <?php wp_footer();?>

</body>
</html>
4. Now open your functions.php file inside your theme folder and add couple of functions: load_stylesheets() and add_js(). The first one adds style sheets to the page and the other adds script files. So, name them whatever you like, but they should be meaningful. Now, inside the load_stylesheets() function, we are going to add style links. Something like shown below:
As you can see in the example above, inside the wp_register_style function, we pass the name (anything we give) followed by path to the style which starts with getting the directory of the template and followed by the relative path of style sheet. After that some default parameters. After that we enqueue the style with a call to the wp_enqueue_style function. Follow the same with all stylesheets you want to add.
NB: Do not add external style sheets this way and rather leave them in the header.php file as it is.
After the function, add a function call add_action('wp_enqueue_scripts', 'load_stylesheets'); This will add the styles to the page. Your functions.php file, now should look something like this:
5. In the same functions.php file, inside add_js() function, add the scripts you want to add (normally present before the end of </body> tag). Something like shown below:
As you can see we are following similar pattern to what we did with styles, but in this case, we use wp_register_script and wp_enqueue_script.
NB: Do not add external scripts this way and rather leave them in the footer.php file as it is.
After the function add a call to the function add_action(‘wp_enqueue_scripts’, ‘add_js’); which will add these scripts to the page. Your functions.php file now should look something like this:
6. Add some more functions to the functions.php file as mentioned below:
7. Now remove all style sheet links from header.php and script links from footer.php for which we have made entries in our functions.php file.
8. Next, copy all the remaining part of the HTML (part left out after header and footer code is moved to respective PHP files) from index.html and paste it in front-page.php. After that, at the beginning of the file add get_header(); and at the end of the file add get_footer();. It should look something like this:
<?php
    /**
    * Template Name: Front Page
    *
    * This is the static homepage of this theme. Will be rendered when user select such a page whose
    * page template is home in static front page setting.
    */
    get_header();
?>

<! The rest of the code from index.html file like divs, sections, images etc.-->

 <?php get_footer(); ?>
9. If you open the site now, you would see the website missing all images.
10. Now, let’s re-visit all the pages and change the image locations so that they can be fetched properly and show on the page. To do that, we will replace all image src values and background url values. So they should look something like this. The left is before and right is after.
11. If you open your WordPress site, you should see the site with all images and the site loading properly.
12. Now, open class-wp-bootstrap-navwalker.php file and make some changes to match how your nav menu looks like when it’s just a a simple HTML site to when it’s in WordPress. For example, I used Bootstrap, so my nav menu had specific classes to make it look good. So I made similar changes to the file. Something like this:
Next step is to create a menu under Appearance > Menus under WordPress admin and it will show up at the top of the page. For example as shown below:
This completes the first part of converting HTML site to WordPress. In next part, we will see how to make content on the header, footer and front page dynamic, how to add pages, carousels and more.